7 count Plastic Canvas Clear Mesh - 2 pieces
7 Count Plastic Canvas Red Mesh - 1 piece
Needloft Yarn:
#41 White - 28 yds.
#01 Red - 26 yds.
#32 Royal - 33 yds.
To Finish Project:
Elastic Cord (5 inches)
Raised White Button
Continental Stitch
Slanting Gobelin
Whip Stitch
Overcast
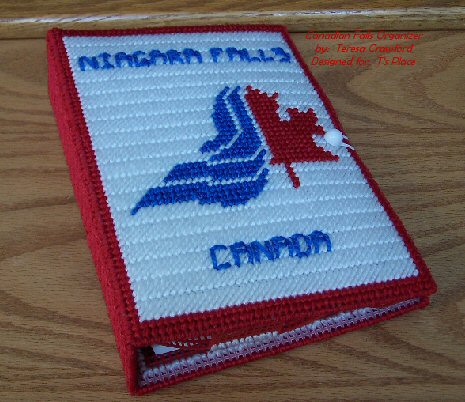
**This is dedicated to my daughter's Girl Scout Troop #631, especially Jennifer & Jessica because they suggested something similar to this. The Troop is to go to Niagara Falls, Canada to perform their "Bridging Over" from Junior Girl Scouts to Cadette Girl Scouts.**
Organizer Front & Back: Cut 4 pieces of clear canvas 45X63 threads (44X62 holes). Stitch 1 piece according to the Front Pattern. You can sew a raised button on the front of the Organizer (as indicated on the finished project picture). Stitch 1 piece according to the Back Pattern. When done, you can stitch a person's name or whatever you might want to in White or just leave plain). Sew a piece of elastic cord, looped, on the back of the Organizer (as indicated on the finished project picture). The other 2 pieces will be unstitched and they are for the liner.
Organizer Spine: Cut 1 piece of clear canvas 14X63 threads (13X62 holes). Stitch the spine according to the pattern. (If you want you can stitch it in alternating colors but we decided to leave it all red). Overcast in red, the top and bottom.
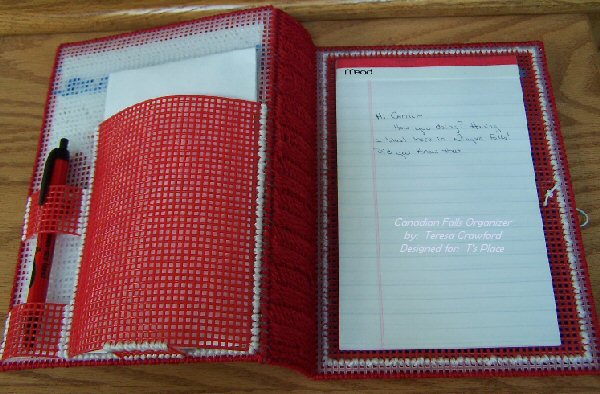
Liner of Organizer for Front: Cut 1 piece of red canvas 34X41 threads (33X40 holes) for the Envelope/Picture Holder. Cut 1 piece of red canvas 11X6 threads (10X5 holes) for the Envelope/Picture Holder bottom. Cut 2 pieces of red canvas 14X9 threads (13X8 holes) for the Pen Holder. You will have to use instructions and also the finished project picture to help you along for placement. Whipstitch sides of the Pen Holder to a liner (which is unstitched clear canvas) using white (putting 1 piece at 9th hole from bottom and 12th from the left side - so it bubbles up a little and then putting 1 piece at 29th from bottom and 12th from the left side). Whipstitch sides of the Envelope/Picture Holder to the liner using white (placing it at the 41st from the bottom and 43rd hold from the left side - so it bubbles up alittle). Whipstitch the Envelope/Picture Holder bottom to the Envelope/Picture holder, using white.
Liner of Organizer for Back: Cut 1 piece of red canvas 41X59 threads (40X58 holes) for the Notepad Holder. Cut a hole (36X3 holes) starting at the 5th hole down, 3rd hole over. Whipstitch all 4 sides of the Notepad holder to a liner (which is unstitched clear canvas) using white.
Finishing Project: Using red, Whipstitch the Front Inside Liner to the backside of the Front of the Organizer on 3 sides, leaving right side not stitched together. Whipstitch, in red, the Back Inside Liner to the backside of the Back of the Organizer on 3 sides, leaving left side not stitched together. Whipstitch the Spine to both the Front and the Back of the Organizer, using red. Using the elastic loop wrap around the button on the front of the Organizer, this will keep it closed.
The Pattern
![]()
![]()
Questions or comments? Contact teresa@tsplace.com
Copyright 1997-2017 Teresa Crawford. Not for commercial use without permission
Back to T's Place!
